Accessing CS Home Dir and Web Files
Connect to any Departmental Ubuntu machine using your preferred SFTP/SCP client with your CCID and you can access your files at /cshome/CCID and /compsci/webdocs/CCID
Some examples of SFTP/SCP clients are WInSCP, FileZilla and Cyberduck. We have provided some basic instructions on installing and using these software packages below.
Hosts
For undergraduates you could use ohaton.cs.ualberta.ca
For graduates you could use innisfree.cs.ualberta.ca
These are just suggested hosts, but there are others in the cs.ualberta.ca domain that can be used.
Please see resources/technical-support/computing-resources/index for more options.
WinSCP
Installing WinSCP
- Go to the WinSCP Download page and download the most recent non-beta version.
- Double click the downloaded file (named something like WinSCP-X.XX.XX-Setup.exe)
- Follow the instructions to set up and install WinSCP
- Once setup and installation is complete, you can now run the WinSCP application by searching “WinSCP” on your computer or launch from your Start Menu
Accessing webdocs using WinSCP
- Run the WinSCP application
- A Login dialog will appear on startup
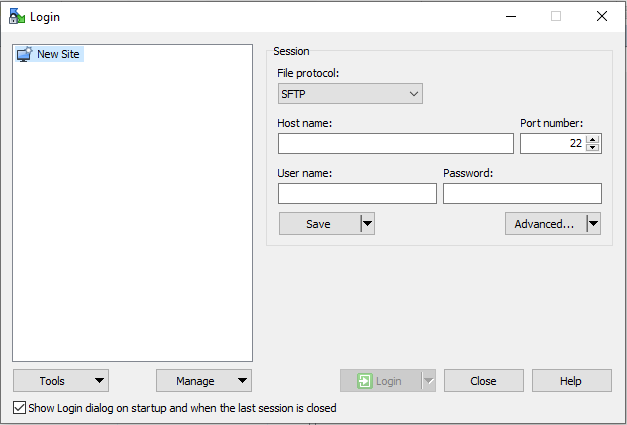
- File Protocol: choose SFTP
- Host name: refer to Hosts
- Port number: 22
- User name: your CCID
- Password: corresponding password for your CCID

- Select Login
- You may get a warning that says you are connecting to an unknown server and the server’s host key was not found.
- Ensure that the host name you entered is typed correctly and select Yes
- You should not get this message again after the first login
- By default, you should see /cshome/CCID/ on the right panel
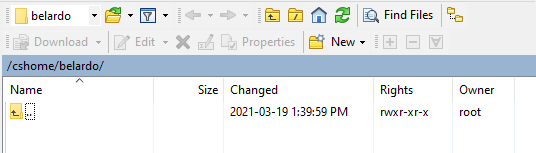
- To access your webfiles, go to /compsci/webdocs/CCID
- Click on the path. By default, it is /cshome/CCID/*.* The following window should appear:
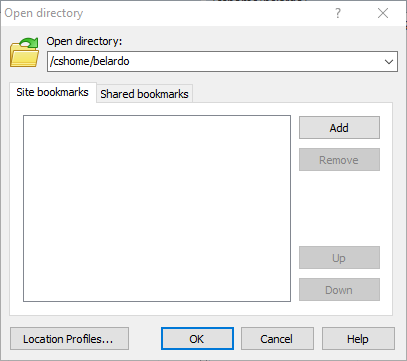
- Type /compsci/webdocs/CCID and press OK

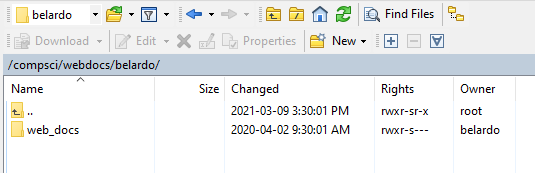
- The right panel should update to the /compsci/webdocs/CCID directory
- Click on the path. By default, it is /cshome/CCID/*.* The following window should appear:
- You should now be able to copy files from your local directory (left panel) to your remote directory (right panel), and vice versa
Uploading files using WinSCP
- On the left panel, select the local file(s) you want to copy
- Double check that the right panel is the correct remote directory you want to copy files to
- Select Upload and press OK. Alternatively, you can drag and drop files from the left panel to the right panel
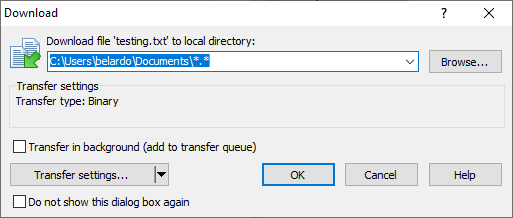
- A dialog box may appear. You can change some settings, or press OK to start the transfer
- After the transfer is complete, you should see the file on the right panel
Downloading files using WinSCP
- On the right panel, select the remote file(s) you want to copy
- Double check that the left panel is the correct local directory you want to copy files to
- Select Download and press OK. Alternatively, you can drag and drop files from the right panel to the left panel
- A dialog box may appear. You can change some settings, or press OK to start the transfer

- After the transfer is complete, you should see a copy of the files on the left panel
Downloading files using WinSCP
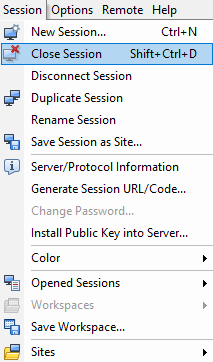
- On the menu bar, select Session > Close Session to terminate the current session and close the tab
- If you closed the session, you will be taken back to the Login Dialog prompt
FileZilla
Installing FileZilla
- Go to the FileZilla download page and download the latest version of the FileZilla client
- When prompted to choose your edition, download “FileZilla” for the free version
- Double click the downloaded file (named something like FileZilla_X.XX.X_sponspored -setup.exe)
- Follow the instructions to setup and install FileZilla
- To run the application, you can search for “FileZilla” on your computer or launch from your Start menu
Accessing webdocs using FileZilla
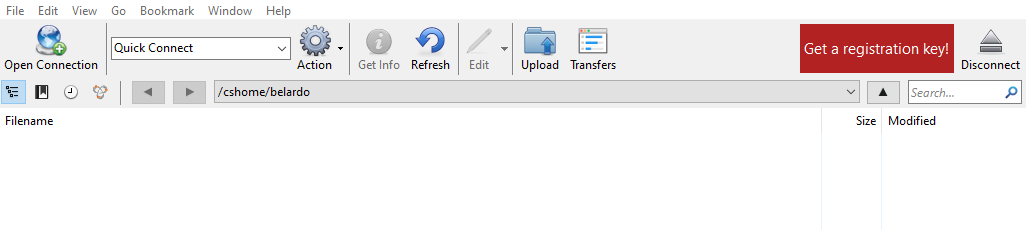
- Run the FileZilla application
- Connect to a server

- Host: refer to Hosts. You must prepend sftp:// (ie. sftp://ohaton.cs.ualberta.ca)
- Username: your CCID
- Password: corresponding password for your CCID
- Port: 22

- Select Quickconnect
- You may get a warning that says the server’s host key is unknown
- Ensure that the host name you entered is typed correctly, check the box to trust this host, and select OK
- You should not get this message again after the first login
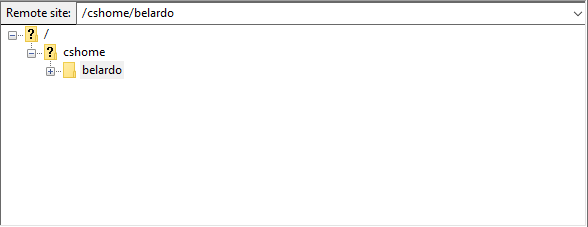
- By default, you should see /cshome/CCID/ on the right panel as Remote site
- To access your webfiles, go to /compsci/webdocs/CCID
- Click on the Remote site: field on the right panel
- Type in /compsci/webdocs/CCID and press Enter

- You should be able to see the /compsci/webdocs/CCID directory
- You should now be able to copy files from your local directory (left panel) to your remote directory (right panel), and vice versa
Uploading files using FileZilla
- On the top-left panel, select the local directory. The bottom-left panel will show the contents of that directory. On the bottom-left panel, select the local file(s) you want to copy
- Double-check that the top-right panel is the correct remote directory you want to copy files to. The bottom-right panel will show the contents of that directory
- Right-click the selected file(s) and select Upload. Alternatively, you can drag and drop files from the bottom-left panel to the bottom-right panel
- You can see the process of the transfer at the bottom of the window
- After the transfer is complete, you should see the file on the bottom-right panel
Downloading files using FileZilla
- On the top-right panel, select the remote directory. The bottom-right panel will show the contents of that directory. On the bottom-right panel, select the remote file(s) you want to copy
- Double-check that the top-left panel is the correct local directory you want to copy files to
- Right-click the selected file(s) and select Download. Alternatively, you can drag and drop files from the bottom-right panel to the bottom-left panel
- You can see the process of the transfer at the bottom of the window
- After the transfer is complete, you should see the file on the bottom-left panel
Disconnecting from server in FileZilla
- Select the Disconnect from server icon (boxed in red)

- After disconnecting, the status should be “Disconnected from server” and the bottom-right panel should say “Not connected to any server”
Cyberduck
Installing Cyberduck
- Go to the Cyberduck download page and download the most recent non-beta version for your platform
- Double click the downloaded file (named something like Cyberduck-Installer-X.X.X.XXXXX.exe)
- Follow the instructions to setup and install Cyberduck
- To run the application, you can search for “Cyberduck” on your computer or launch from your Start menu
Accessing webdocs using Cyberduck
- Run the Cyberduck application
- Select Open Connection

- An Open Connection window will appear

- Change FTP (File Transfer Protocol) to SFTP (SSH File Transfer Protocol)
- Server: refer to Hosts
- Port: 22
- Username: your CCID
- Password: corresponding password to your CCID

- Select Connect
- You may get a warning about an unknown key sent by the server
- Ensure that the host name you entered is typed correctly, check the box to Always allow this host, and select Allow
- By default, you should see the path /cshome/CCID at the top
- To access your webfiles, go to /compsci/webdocs/CCID
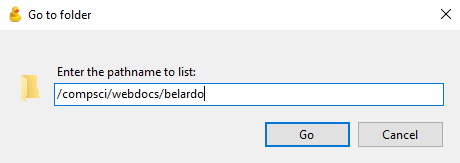
- On the menu bar, select Go > Go to folder. Alternatively, you can press Ctrl+G
- Type /compsci/webdocs/CCID and press Go
- You should be able to see the /compsci/webdocs/CCID directory
- You should now be able to copy files from your local directory to your remote directory, and vice versa
Uploading files using Cyberduck
- Select Upload

- Locate the file(s) you want to copy to the remote directory and select Choose
- A Transfers window will appear that shows the progress of the upload
- Once complete, you should see the file in the remote directory in the Cyberduck window
Downloading files using Cyberduck
- Locate the file(s) you want to copy to your local directory and select Download As… Alternatively, you can press Alt+Shift+Down
- Choose where you want to place the file and select Save
- A Transfers window will appear that shows the progress of the download
- Once complete, you should see the file in your local directory
Disconnecting from a session on Cyberduck
- Select Disconnect
