Exploration Credits Application Guide
On This Page
Step 1. Log into Bear Tracks
Log into Bear Tracks using your CCID.
Step 2. Navigate to Exploration Credits
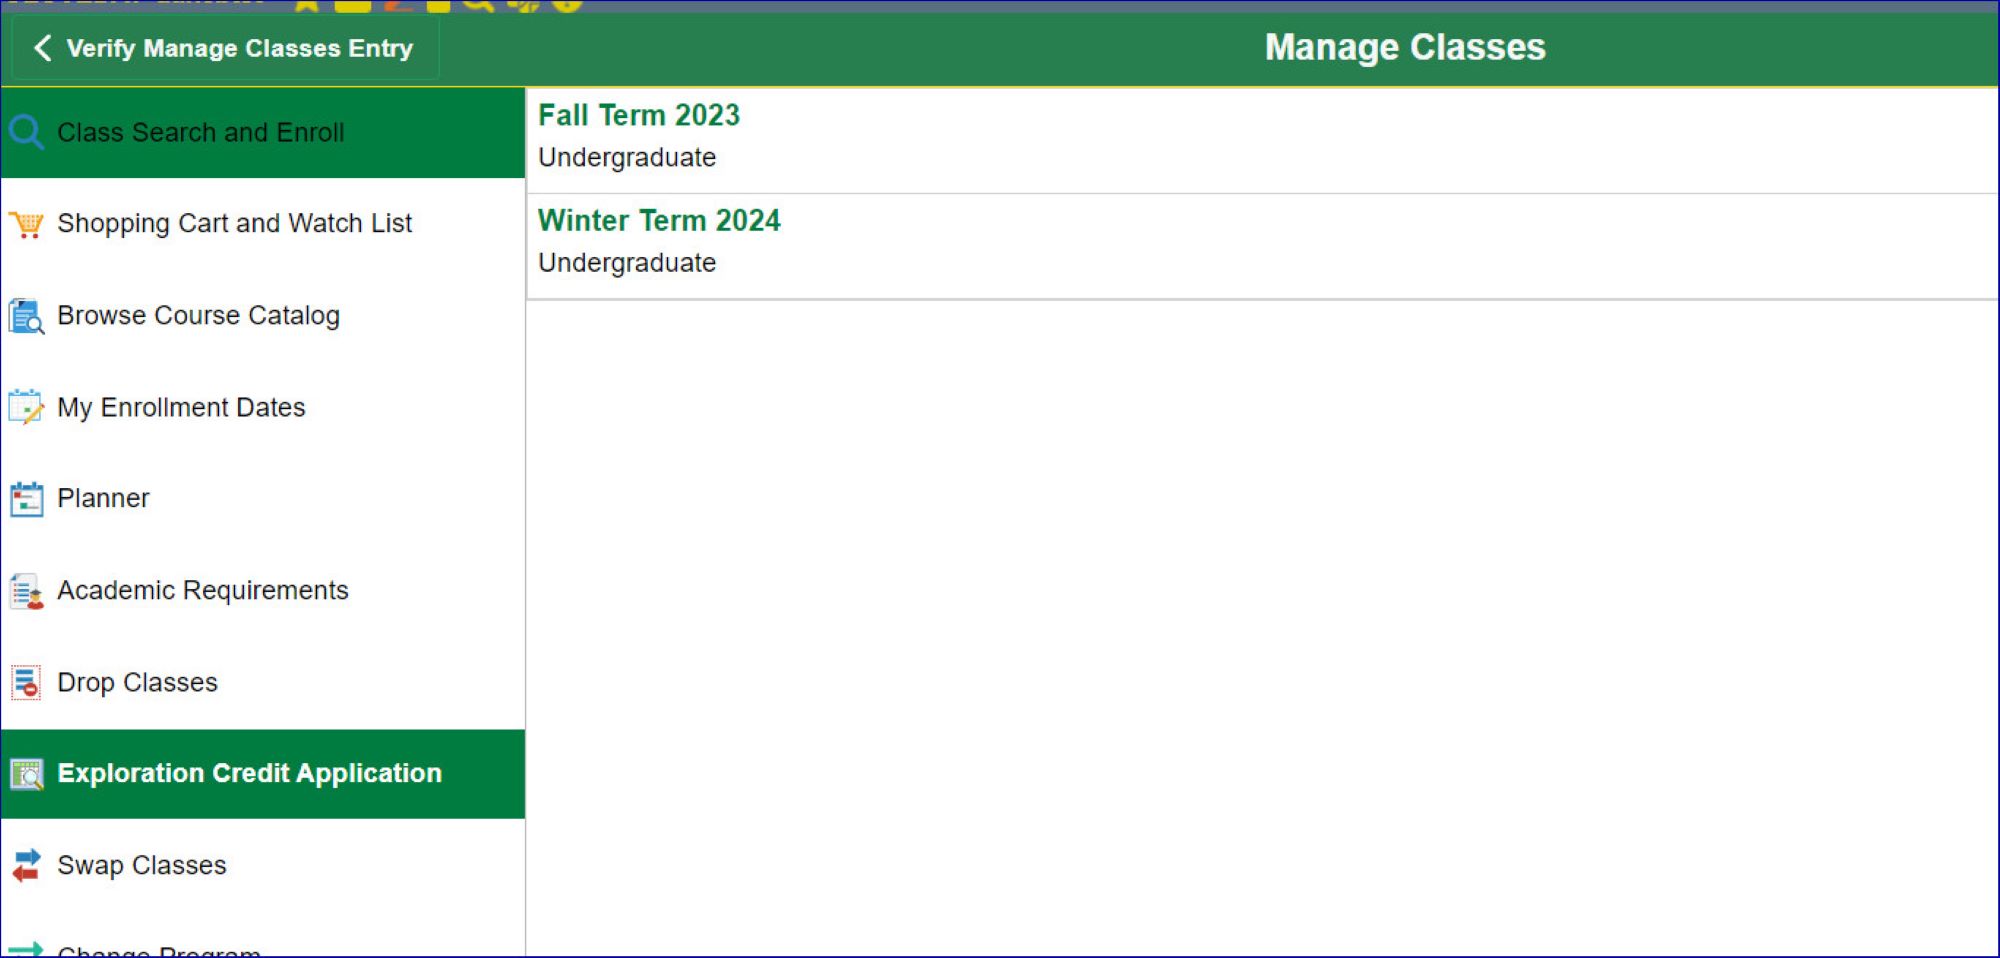
- Click on the Manage Classes tile
- Click on Exploration Credit Application in the left hand navigation menu and select the term for which you would like to apply.
Step 3. Application Steps
- Understand Policy, Eligibility and Instructions
- Take the time to review the important exploration credits policy and eligibility information as well as the application instructions before applying.
- Select Next to move to application Step 2.
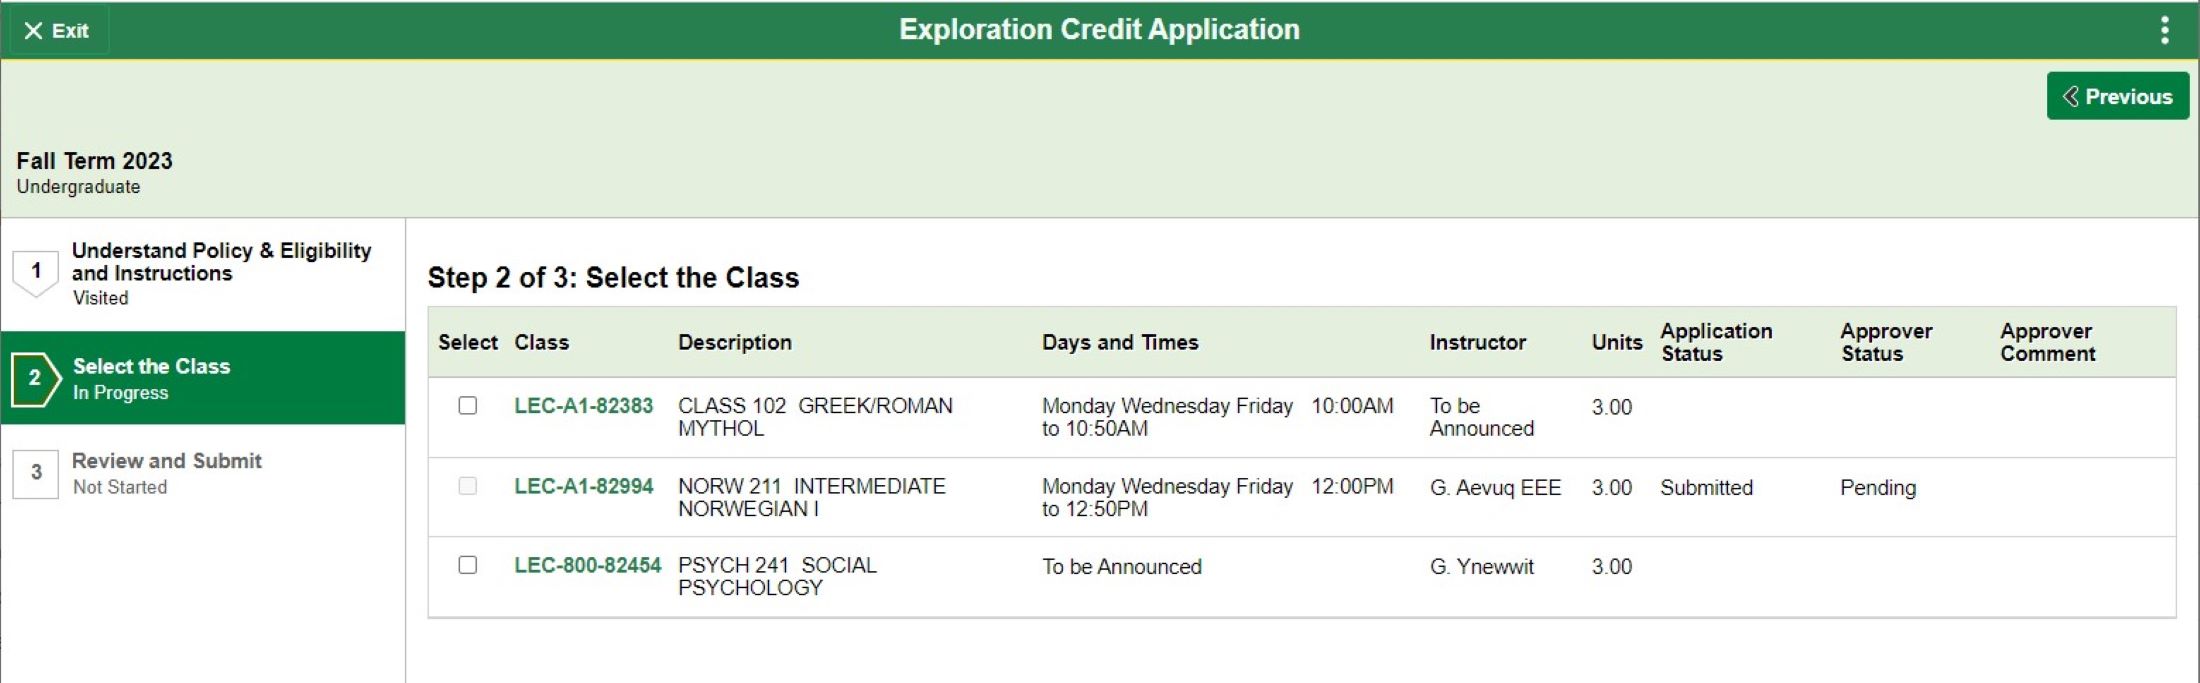
- Select the Class
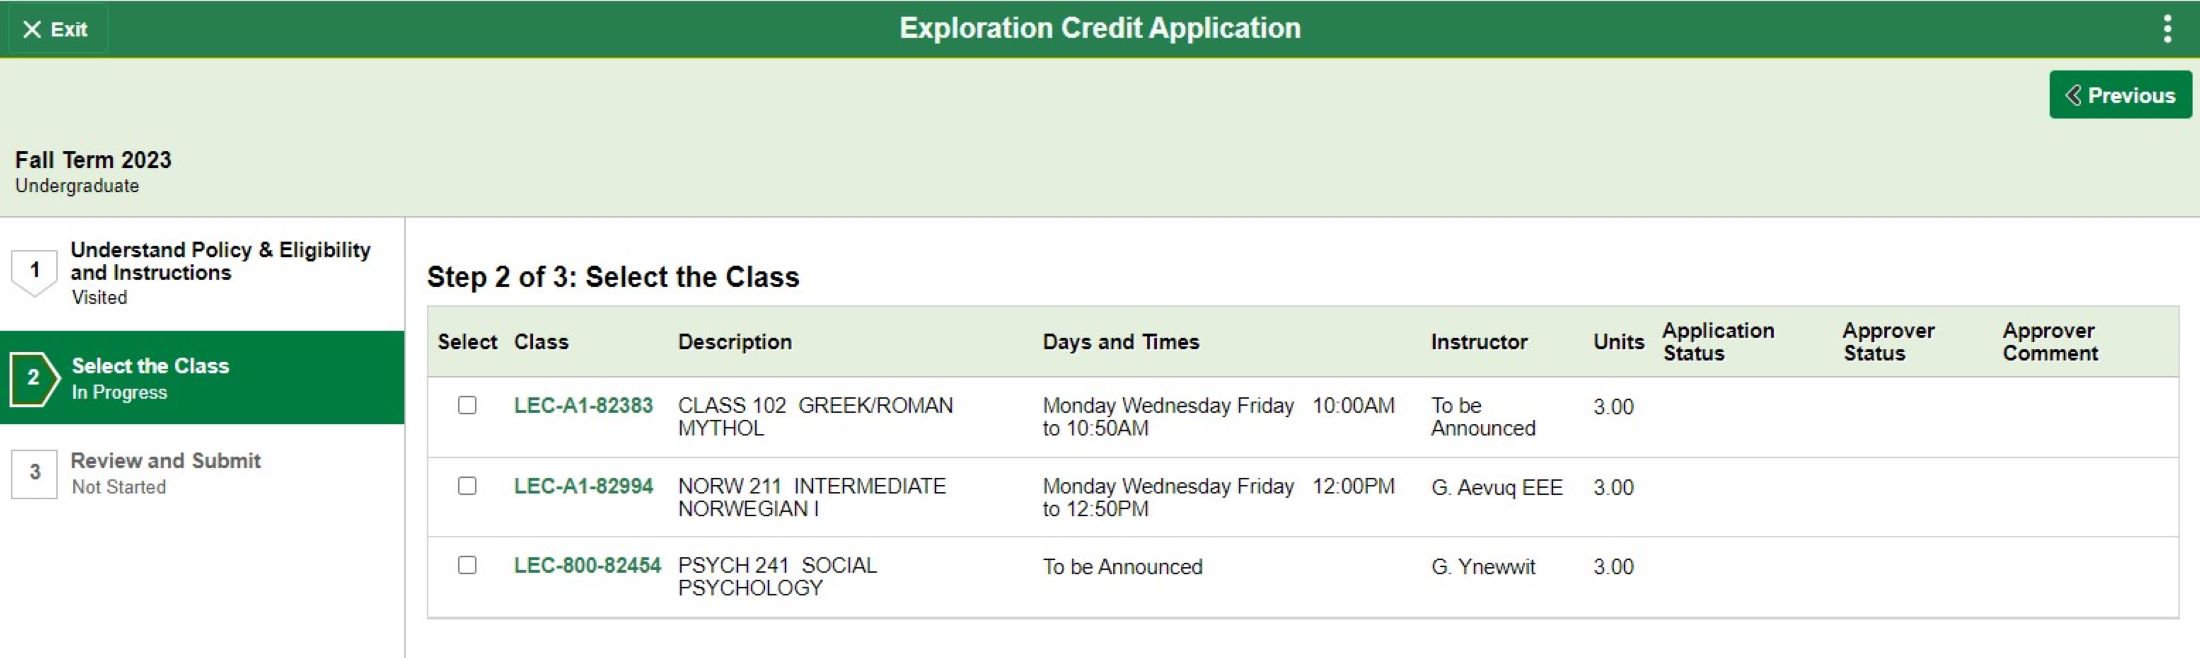
- Use the checkbox beside the class information to select the class for which you would like to apply.
- Reminder: you may take a maximum of 3 units of exploration credits per term and a maximum of 6 units of exploration credits per academic year.
- Note: You can apply for two term (A/B) classes by applying to the “B” portion of the class.
- Reminder: you may take a maximum of 3 units of exploration credits per term and a maximum of 6 units of exploration credits per academic year.
- A message will appear asking you if you would like to proceed.
- Yes: confirms your selection as completed. You will not be able to select any other classes at this time.
- No: removes the selected class and allows you to re-select a class.
- Once you have confirmed the class you would like to apply for exploration credits in, select Next to move to application Step 3.
- Review and Submit
- This is the final opportunity to review your selection. Select the Submit button to finalize and submit your application.
- A message will appear asking you if you would like to proceed with submitting your application.
- Yes: submits your application. A message will pop up confirming your application has been submitted.
- No: returns you to application Step 3.
- Please note, once your application is submitted, you cannot cancel it.
Step 4. Monitor the Status of Your Application
- Return to the “Select the Class” portion of the application per the steps above.
- The application in the example above currently shows as Submitted and Pending approval. The Approver Status will update to Approved or Denied once your Faculty makes a decision on your application. They may also add an Approver Comment to provide additional information related to their decision.